How to Reapply Thermal Paste on a Gaming PC CPU
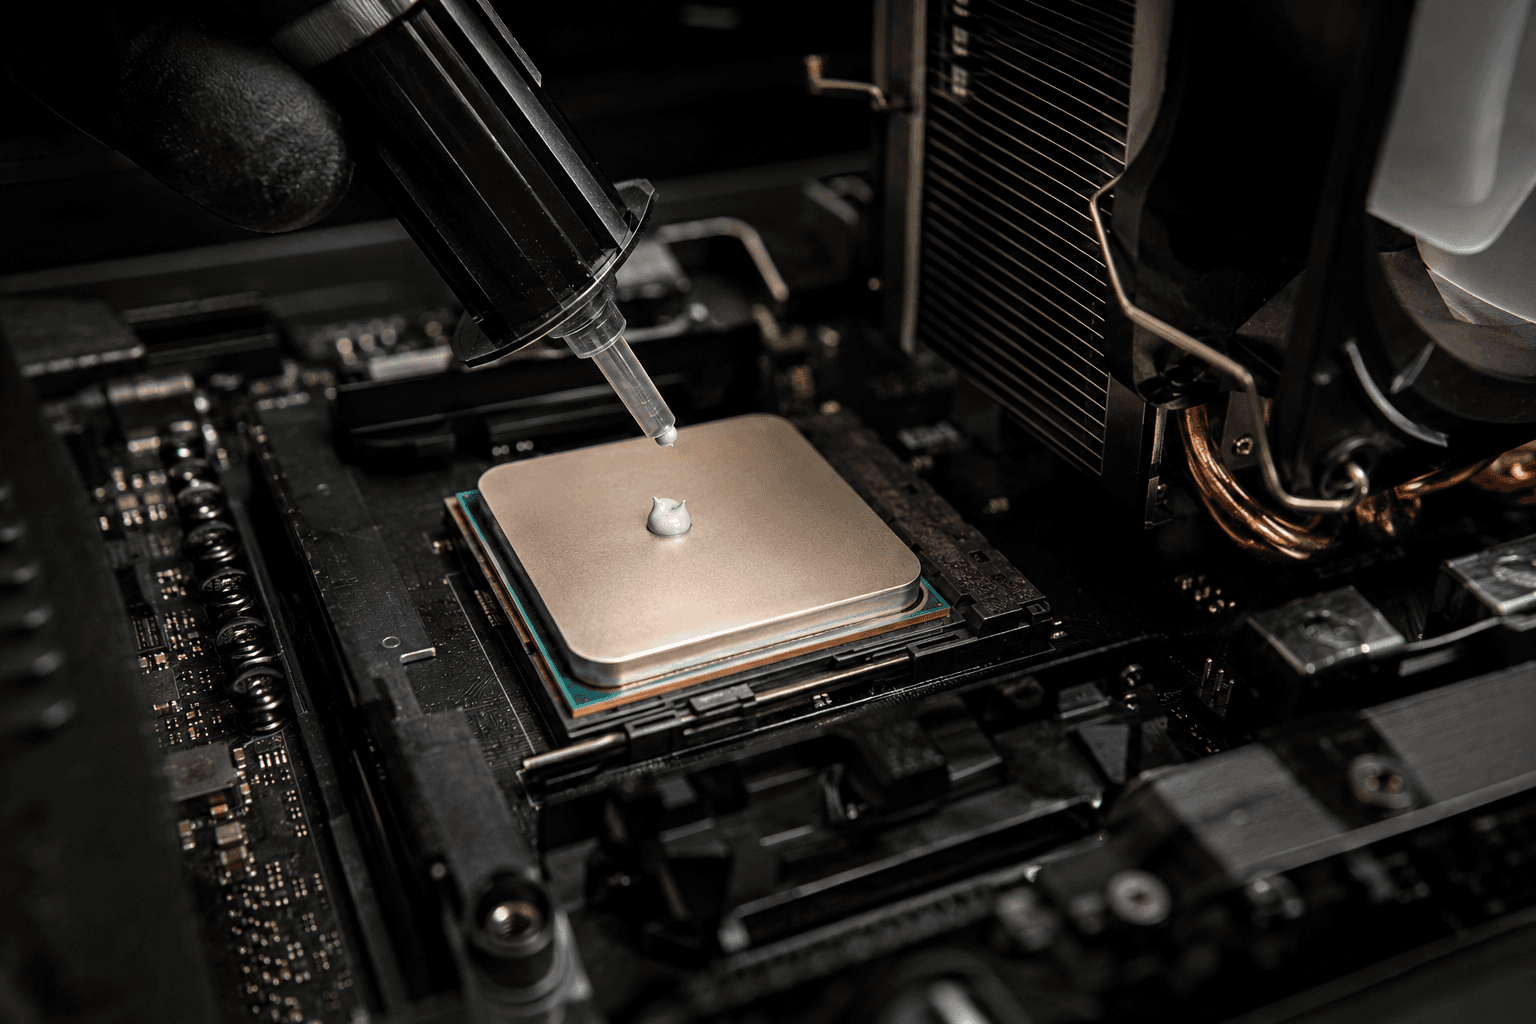
How to Reapply Thermal Paste on a Gaming PC CPU
Reapplying thermal paste is a straightforward job that can drop CPU temperatures by 10 to 20 degrees Celsius on an older system. The original paste that ships between your CPU and cooler dries out over time, losing its ability to transfer heat efficiently. When that happens, temperatures creep up, performance drops, and your cooling solution starts working harder than it should for the same results.
This guide walks through the full process from start to finish, including which paste to use, how to apply it correctly, and the mistakes worth avoiding.
When Should You Actually Reapply Thermal Paste?
Not every system needs fresh paste urgently, but there are clear signs that it's time. If your CPU temperatures have climbed noticeably compared to when the system was new, if you're seeing throttling under load, or if your cooler sounds like it's working flat out even during lighter tasks, old paste is a likely contributor.
As a general rule, thermal paste on a desktop PC benefits from being refreshed every three to five years. On a gaming rig that runs hot regularly, closer to three years is sensible. If you've just bought a second-hand system and have no idea when paste was last applied, do it now regardless. It costs almost nothing and takes under half an hour. If your temperatures are climbing under load and causing instability, it's also worth reading up on thermal throttling and how to stop it to understand how heat affects performance before and after the repaste.
What You Need Before You Start
You don't need much for this job. A small tube of thermal paste, some isopropyl alcohol (90% or higher), lint-free cloths or coffee filters, a Phillips screwdriver, and your CPU cooler's manual if you've misplaced the backplate or mounting hardware.
On thermal paste itself: the market is full of options at different price points. For most gaming builds, a mid-range paste like Thermal Grizzly Kryonaut or Arctic MX-6 is all you need. They perform well, they're easy to apply, and they last. Liquid metal pastes like Thermal Grizzly Conductonaut offer better conductivity numbers on paper, but they're electrically conductive, which means a single slip can damage your hardware. Unless you really know what you're doing, standard paste is the right call for a gaming CPU.
Step One: Remove the Cooler
Power down the system completely and unplug it from the wall. Give it a few minutes to cool down before opening the case, especially if it's been under load recently.
Removing the cooler depends on what type you have. Air coolers typically use either push-pin mounts or a backplate with screws. Loosen screws in a cross pattern rather than fully tightening one side before the other, the same way you'd tighten wheel bolts on a car. This prevents uneven pressure on the CPU die. AIO liquid coolers follow the same principle for the pump head, though you'll leave the radiator and fans in place.
Once the cooler is off, set it down on a clean surface with the contact plate facing up so the old paste doesn't smear onto anything.
Step Two: Clean Off the Old Paste
This step matters more than most guides acknowledge. If you apply new paste on top of dried old paste, you're wasting your time. The old material needs to come off completely from both the cooler contact plate and the CPU heat spreader.
Apply a small amount of isopropyl alcohol to a lint-free cloth or coffee filter and wipe the surfaces in gentle circular motions. Don't scrub aggressively. Let the alcohol do the work. Repeat until no grey residue remains and both surfaces look clean and reflective. For stubborn dried paste, a slightly longer soak with the alcohol before wiping usually shifts it.
Avoid using paper towels. They leave fibres behind. Lint-free cloths or coffee filters are cheap and do the job cleanly. Let both surfaces dry fully before moving on, which usually takes under a minute at room temperature.
Step Three: Apply the New Paste
There are several application methods and the internet has been arguing about which is best for years. The honest answer is that for a standard desktop CPU with a large integrated heat spreader, the differences between methods are negligible in practice. What matters is using the right amount, not the pattern.
The most commonly recommended method is the pea-sized dot in the centre of the heat spreader. When the cooler is pressed down, this spreads out naturally to cover the contact area. It works well for square and rectangular heat spreaders alike.
The other thing to avoid is using too much paste. More is not better. Excess paste squeezes out around the edges of the cooler, doesn't aid heat transfer, and in rare cases can cause problems if it reaches the socket area. A small pea-sized amount, roughly the size of a grain of rice, is sufficient.
Step Four: Reinstall the Cooler
Line the cooler up carefully over the mounting points. Lower it straight down rather than dragging it across the paste, which would displace the application unevenly. Once seated, tighten the mounting screws in a cross pattern, gradually increasing pressure rather than fully tightening one corner at a time.
The goal is even, consistent pressure across the entire contact surface. Uneven mounting is one of the most common causes of poor thermal paste results even when the paste itself is applied correctly. If you're reinstalling an air cooler, check the fins are oriented correctly for your case airflow. If you're remounting an AIO pump head, make sure the orientation matches how it's designed to run.
Step Five: Boot Up and Check Temperatures
Reconnect everything, plug the system back in, and boot up. Download HWiNFO64 or use HWMonitor to track CPU temperatures. At idle, a modern desktop CPU should sit somewhere between 30 and 50 degrees Celsius depending on ambient room temperature and cooler quality. Under sustained gaming load, most well-cooled systems sit between 65 and 85 degrees.
Run a stress test or a demanding game session for 15 to 20 minutes and monitor peak temperatures. If temperatures have dropped meaningfully compared to before the repaste, the job is done. If they haven't moved much, the issue may lie elsewhere, such as case airflow, cooler mounting pressure, or a cooler that's simply too small for the CPU's heat output.
Common Mistakes That Make Things Worse
One mistake I see regularly is people using too much paste, assuming it will fill gaps and improve contact. It does the opposite. Excess paste acts as insulation in some cases and can cause the cooler to not seat flat against the heat spreader.
Another common error is not cleaning surfaces thoroughly before applying fresh paste. Layering new paste over old material leaves an air gap between the two compounds that kills thermal transfer. Both surfaces need to be completely clean.
Skipping the cross-pattern tightening is also a frequent issue. Tightening one side fully before the other rocks the cooler and creates uneven contact. This alone can cost several degrees in temperature compared to a properly mounted cooler with average paste.
Finally, people sometimes assume that after a repaste the temperatures should drop immediately to unrealistically low numbers. Thermal paste performance does improve slightly over the first few hours as it settles and spreads under heat cycles. Give it a few gaming sessions before drawing conclusions.
Does the Cooler Itself Need Replacing?
Reapplying paste won't fix a cooler that's genuinely undersized for your processor. If you've done everything correctly and your CPU is still hitting 90 degrees or higher under gaming load, the cooler itself is the problem. Most budget prebuilts ship with stock coolers that are barely adequate for the CPU they're paired with. If that's your situation, a new cooler will deliver far more improvement than any paste swap.
The good news is that aftermarket air coolers at reasonable price points offer substantial temperature improvements over stock solutions. If your RAM upgrade is already sorted and temperatures are still a concern, a cooler upgrade is the logical next step before looking at anything else.
Reapply Checklist
✓ Power down fully and unplug from the wall
✓ Remove cooler carefully using cross-pattern loosening
✓ Clean CPU heat spreader and cooler contact plate with isopropyl alcohol
✓ Apply a pea-sized amount of paste to the centre of the CPU
✓ Reinstall cooler with even, cross-pattern tightening
✓ Monitor temperatures at idle and under load after booting
✓ Enable XMP or EXPO in BIOS if you're repasting after a RAM upgrade
What Thermal Paste Should You Buy?
For most gaming builds, these three options cover the range sensibly:
→ Arctic MX-6 — Excellent value, easy to apply, non-conductive, long lifespan
→ Thermal Grizzly Kryonaut — High performance, slightly higher cost, good for enthusiast builds
→ Noctua NT-H2 — Reliable, widely available, good longevity between applications
All three are available from major UK retailers including Amazon UK and Scan. Avoid extremely cheap no-name pastes, particularly anything that comes pre-applied to budget cooler replacements. The performance gap between a decent mid-range paste and a poor one is meaningful over the life of the build.
Does Reapplying Paste Void Warranty?
On most prebuilt gaming systems, removing the CPU cooler technically falls under the category of internal modification. Some manufacturers allow it, others consider it grounds to void the warranty. Check your prebuilt's documentation before opening anything if the system is still covered.
If the system is out of warranty, which it likely is if you're reading this, there's nothing to worry about. This is a completely safe and standard maintenance task.
How Often Should You Do This?
For a desktop gaming build under regular use, every three to five years is a reasonable interval. If your system lives in a warm room, runs demanding workloads daily, or has a smaller cooler with less thermal headroom, lean towards the shorter end. You'll know it's time again when temperatures start climbing back towards where they were before the last repaste, or when performance starts feeling sluggish in ways that don't match your hardware on paper. Regular dust cleaning inside the case helps extend the time between repastes by keeping overall thermals in check.
Frequently Asked Questions
How do I know if my thermal paste needs replacing?
The clearest sign is CPU temperatures that are higher than they used to be under the same workload. If your system is several years old and you've never reapplied paste, that's reason enough to do it regardless of whether temperatures are visibly elevated.
Can I use any thermal paste on my CPU?
Most standard thermal pastes are compatible with any desktop CPU. The main distinction to be aware of is avoiding electrically conductive liquid metal pastes unless you're experienced, as these can cause damage if misapplied. Standard silicone or metal oxide compounds are safe for all consumer CPUs.
How long does thermal paste last?
Quality thermal paste on a desktop CPU typically lasts three to five years before it begins to dry out noticeably. Cheaper compounds degrade faster. The environment matters too, as systems running hotter tend to age paste more quickly.
Do I need to remove the CPU to reapply paste?
No. The CPU stays in the socket throughout the process. You only remove the cooler, clean both surfaces, apply new paste, and remount. The CPU itself is never touched.
What happens if I apply too much thermal paste?
Excess paste squeezes out around the edges of the cooler when pressure is applied. This doesn't improve heat transfer and can be messy to clean up afterwards. In very rare cases, excess paste reaching the socket area can cause issues, though this is uncommon on modern CPUs with large heat spreaders. Always use a pea-sized amount.
Will reapplying paste fix thermal throttling?
It can help significantly, especially on older systems where the original paste has dried out. If throttling is severe, check that your cooler is also adequate for your CPU's thermal requirements. Fresh paste won't fully compensate for a badly undersized cooler.
Is isopropyl alcohol safe to use on a CPU?
Yes, provided it's 90% concentration or higher. Lower concentrations contain more water which can cause issues. Apply it to the cloth first rather than directly onto the CPU, and allow both surfaces to dry completely before applying new paste.