10 Common PC Building Mistakes to Avoid
Building your own PC is one of the most satisfying things you can do as a gamer or enthusiast. It also has a fairly unforgiving learning curve if you go in blind. The good news is that most mistakes people make during a first build aren't unique — they're the same ones that come up time and time again. Avoiding them doesn't require years of experience. It just requires knowing what to look out for before you start.
This guide covers the ten most common PC building mistakes, drawn from real-world builds and repair work rather than a checklist of theoretical problems. Some of these will save you money. A few could save you from frying components.
Mistake 1: Buying a Cheap or Undersized Power Supply
If there's one area where first-time builders consistently cut corners, it's the power supply. The PSU is the last place you want to save money. A low-quality unit from an unknown brand won't just underperform — it can damage other components if it fails under load, and budget PSUs fail far more often than they should.
The two most common errors here are buying an unbranded unit to save £20–£30, and buying a PSU that's technically adequate on paper but leaves no headroom for future upgrades or sustained load. A good rule of thumb: calculate your system's expected power draw using an online estimator, then buy a PSU rated for 20–30% more than that figure. If your components draw 550W at full load, a 750W 80+ Gold unit is the right call — not a 600W unit from a brand you've never heard of.
Reputable brands like Corsair, be quiet!, Seasonic, and EVGA have strong track records. Anything labelled 80+ Bronze or better from those manufacturers is a safe baseline. Understanding what wattage your specific components need before purchasing is worth doing properly — it's one of the decisions that affects long-term reliability more than almost anything else in the build.
Mistake 2: Ignoring CPU and Motherboard Compatibility
This one catches a surprising number of first-time builders off guard. CPUs and motherboards use specific socket types, and they are not interchangeable. An Intel LGA1700 processor will not fit an AMD AM5 board, and even within the same manufacturer's lineup, not every CPU works with every motherboard of the right socket type. Intel's 12th and 13th gen processors share the LGA1700 socket, for example, but 14th gen moved to LGA1851 — a common point of confusion.
Always check the motherboard's QVL (Qualified Vendor List) for CPU compatibility, especially if you're buying a slightly older board with a newer processor. Many B-series boards require a BIOS update before they'll recognise the latest CPUs, which creates a catch-22 if you don't have an older chip to boot into first. Buying from a retailer that offers pre-flashed boards or checking whether the board ships with an updated BIOS is worth the extra step before committing.
Mistake 3: Not Checking RAM Compatibility
RAM compatibility is more nuanced than it used to be, and DDR5 has made it more so. The most common mistake is buying RAM without checking whether it's on the motherboard's supported memory list, or buying a speed that requires enabling XMP or EXPO to actually run at its rated frequency.
By default, most systems will boot DDR5 at a base frequency of 4800MHz regardless of what the RAM kit is rated for. If you've bought 6000MHz DDR5 and haven't enabled XMP or EXPO in the BIOS, you're leaving performance on the table. This sounds obvious, but plenty of people never enable it and run slower RAM than they paid for without realising. Beyond frequency, also check that the total capacity per channel is within the motherboard's supported limits — overfilling slots or mismatching kits is a reliable path to instability.
Mistake 4: Overspending on the CPU and Underspending on the GPU
One of the most consistent budget allocation mistakes in gaming builds — and one that genuinely frustrates me when I see it — is spending heavily on the processor while underinvesting in the graphics card. Gaming performance is driven primarily by the GPU in the vast majority of titles. A mid-range CPU paired with a strong GPU will outperform the reverse combination across almost every game you're likely to play.
A Ryzen 5 7600 paired with an RTX 4070 is a better gaming build than a Ryzen 9 7950X with an RTX 4060, at any similar total price point. The 7950X is an extraordinary CPU for workstation tasks, rendering, and multi-threaded workloads — but for gaming, the extra cores provide almost no benefit. Spend where the performance actually comes from. If you're putting together a build and wondering how your budget is best divided, taking a look at where that money tends to go at different price points is a useful sanity check before committing.
Mistake 5: Forgetting to Apply or Reapply Thermal Paste
Thermal paste sits between the CPU and the cooler's cold plate, filling microscopic imperfections in both surfaces to ensure proper heat transfer. Most aftermarket coolers include a small tube or pre-applied dot. The mistake isn't usually forgetting it entirely — it's applying too much, applying too little, or spreading it incorrectly.
A pea-sized dot centred on the CPU is the standard approach for most Intel and AMD desktop processors. The pressure from mounting the cooler spreads it appropriately. Applying a thick layer and spreading it manually tends to create air pockets, which defeats the purpose. Also worth knowing: thermal paste degrades over time, typically over three to five years of regular use. If you've bought a second-hand system or inherited a PC that's a few years old and temperatures seem high, reapplying fresh paste is often the cheapest and most effective fix before assuming there's a hardware fault.
Mistake 6: Poor Cable Management Affecting Airflow
Cable management gets treated as a cosmetic concern — something to tidy up if you have a glass side panel and want the inside to look clean. In practice it's also a functional issue. Cables routed across the middle of the case block airflow between the intake and exhaust fans, which raises temperatures inside the case and shortens component lifespan over time.
Most mid-range cases have dedicated cable routing channels, grommets, and Velcro tie-down points behind the motherboard tray. Use them. Route power cables through the back of the case wherever possible, and keep the GPU and CPU power cables as short and directed as the case allows. It takes an extra twenty minutes during the build, but it's significantly harder to sort out after everything is installed and running. A case with strong airflow design makes this easier from the start — choosing the right case for airflow is a decision that pays off across the lifetime of the build.
Mistake 7: Not Installing the I/O Shield Before the Motherboard
This is a classic first-build mistake that experienced builders find funny until it happens to them. The I/O shield is the metal plate that snaps into the back of the case and forms the port cluster you plug devices into from the rear. It must be installed before the motherboard goes in. Not after.
If you mount the motherboard first and then realise you've forgotten the I/O shield, you'll need to take the board back out — which means disconnecting everything you've already connected. Some newer motherboards have a built-in I/O shield that eliminates this problem entirely, but many budget and mid-range boards still ship with a separate one. Check before you screw anything down.
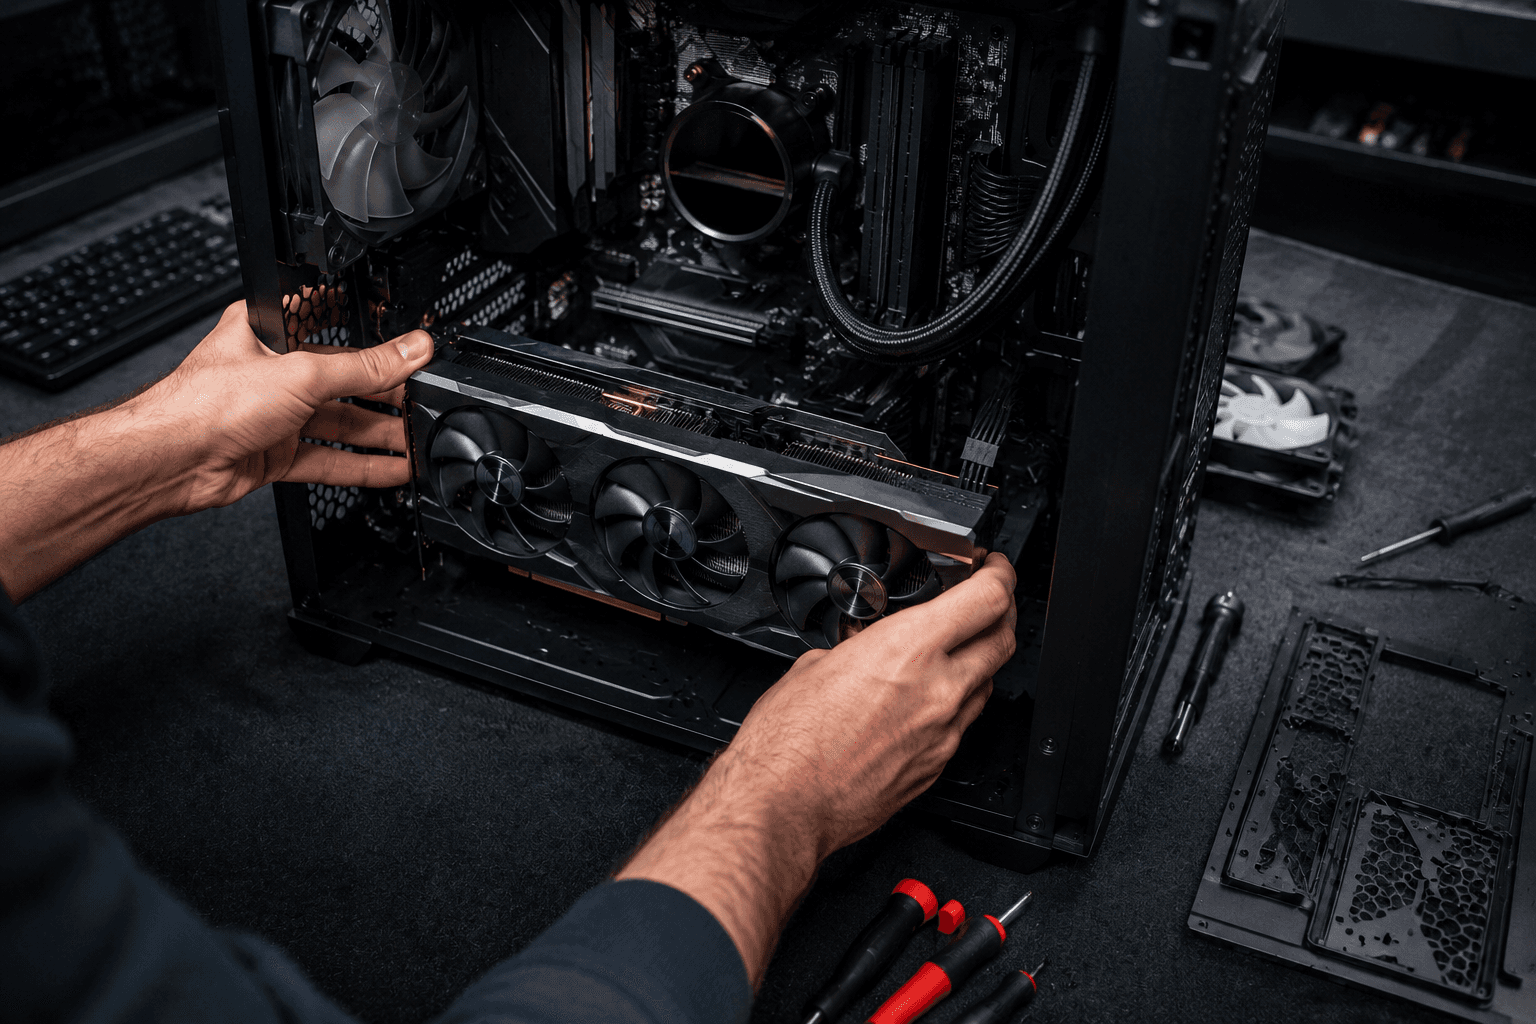
Mistake 8: Forcing Connections That Don't Fit
PC components are almost universally keyed to prevent incorrect insertion — RAM slots, PCIe slots, CPU sockets, and most connectors are physically designed to only go in the right way. Despite this, first-time builders occasionally try to force a connection that isn't seating correctly, assuming more pressure is the answer. It rarely is.
If something isn't clicking in cleanly, stop. Check the orientation. Check for a locking tab that needs releasing. Check that the slot is correct — M.2 slots in particular can be confused with each other on boards that have multiple, and some M.2 slots are keyed for NVMe only while others support SATA. Modern CPU sockets on AMD's AM5 platform use a ZIF (zero insertion force) socket that requires almost no pressure at all — if you're pushing hard, something is wrong. The same goes for RAM: the locking clips on the slot should click audibly when the module is fully seated. If they don't, it's not in.
Mistake 9: Skipping the Test Boot Outside the Case
Before you mount the motherboard into the case and route every cable, it's worth doing a quick bench test — powering the system on with the motherboard outside the case to confirm the CPU, RAM, and GPU are all recognised and the system POSTs correctly. This takes ten minutes and can save hours of diagnosis if something isn't working.
The most common reason to skip this step is impatience, which is understandable. But if you install everything into the case, tidy the cables, close it up, and then find it won't POST, you're stripping the whole thing back down to find a faulty RAM stick or an improperly seated CPU. Testing on the bench first lets you isolate hardware issues before mechanical installation complicates the picture. If something doesn't work at this stage, the cause is almost always one of a short list: RAM not fully seated, CPU power connector not plugged in, or a front panel connector issue.
Mistake 10: Buying Based on Specs Alone Without Checking Bottlenecks
The final mistake is more strategic than mechanical, but it causes genuine long-term frustration. Buying components individually based on their standalone spec sheet without considering how they interact can result in a build where one component is being underutilised because another can't keep up — known as a bottleneck.
The most common example: pairing a very fast GPU with a significantly older or weaker CPU. At 1080p in particular, CPU performance becomes more of a factor as GPU power increases. A £400 RTX 4080 Super deal is less attractive if it's going into a system with an ageing four-core processor that can't feed it frames fast enough. RAM speed is another area — a fast GPU and CPU combination held back by slow or improperly configured RAM is a setup I've seen enough times that it's worth flagging specifically. If you're unsure whether your planned build is balanced, it's always worth getting a second opinion before purchasing. You're welcome to get in touch with us directly if you'd like someone to check your planned component list before you commit.
Quick Pre-Build Checklist
Before you order parts or start assembling, run through these:
✓ PSU wattage calculated with 20–30% headroom, from a reputable brand
✓ CPU and motherboard socket compatibility confirmed
✓ RAM on the motherboard's QVL and XMP/EXPO ready to enable
✓ GPU budget allocated generously relative to CPU
✓ Thermal paste included with cooler or purchased separately
✓ Case has adequate airflow and cable routing channels
✓ I/O shield located before build begins
✓ All connector orientations checked before applying pressure
✓ Bench test planned before case installation
✓ Full component list reviewed for bottlenecks
FAQs
What is the most common mistake when building a PC?
Forgetting to enable XMP or EXPO in the BIOS after installing RAM is probably the single most common oversight — it means your RAM runs slower than you paid for, and it's completely invisible unless you check. Poor PSU selection and motherboard/CPU incompatibility are close behind.
Can a bad PSU damage other components?
Yes. A low-quality or undersized PSU can deliver unstable voltage under load, which degrades components over time or causes sudden failure. In the worst cases, a PSU failure can damage the motherboard, GPU, or storage connected to it. It's not common with reputable brands, but it's a known risk with no-name units.
Do I need to apply thermal paste if my cooler already has it?
If your cooler comes with pre-applied thermal paste already on the cold plate, you don't need to add more — applying additional paste on top would be counterproductive. Only add paste if the cooler has none pre-applied, or if you're reinstalling a cooler that's already been used.
What happens if I forget the I/O shield?
The system will still function, but there'll be a gap at the rear of the case around the port cluster, and the I/O shield also helps with EMI shielding. More practically, you'll need to remove the motherboard to fit it retrospectively. It's easier to just check for it before the board goes in.
How do I know if my build has a bottleneck?
Online bottleneck calculators give a rough indication, though they're not precise. The more reliable method is looking at frame rate versus GPU and CPU utilisation in-game using monitoring software like MSI Afterburner. If your GPU is consistently at 99% utilisation while the CPU is at 40–50%, the GPU is the limiting factor, which is generally ideal. If the CPU is at 95% while the GPU has headroom, that's where the bottleneck is.
Is it worth doing a bench test before installing in the case?
Yes, particularly for first-time builders. It takes a few minutes and immediately confirms whether the core components are working before you've committed to the full installation. If something isn't right, it's far easier to diagnose and address at this stage than after everything is mounted and cabled.
What should I do if my PC won't POST after building?
Start with the basics: check that the 24-pin ATX and CPU power connectors are fully seated, that the RAM is properly clicked in, and that the GPU is fully inserted into the PCIe slot. Remove any extra RAM sticks and test with just one. Check that the power button header on the front panel is connected to the correct pins on the motherboard. If you're still stuck, our contact page is the fastest way to get hands-on advice from someone who's diagnosed this kind of issue before.
Closing Thought
Most PC building mistakes are completely avoidable with a bit of preparation. None of them require advanced technical knowledge — they just require slowing down, checking compatibility before buying, and not letting enthusiasm push you through steps you should be taking carefully. The build itself is rarely where things go wrong. It's the decisions made before components even arrive that cause the majority of issues.
If you're planning a first build and want to make sure the component list is solid before you order, it's far easier to fix on paper than after the fact.